
by Liz Houley-Glassman
In January 2023 our small barn of adult ammies unexpectedly found ourselves scrambling to find a new home for our 13 horses. We landed in a great little barn with great bones, but it had not been occupied in several years. After the epic move, we all caught our collective breath to assess and learned that there were very few existing jumps.
Since I am widely considered the “Ms. Fix It” at the barn, I took on the job of building jumps. It was and remains a true labor of love and a constant source of inspiration. My phone is filled with screenshots of ideas for jumps.
I started building truly basic jumps and have expanded since. I have a few rules and fun tips.
- Use pressure treated lumber for every project
- Sand/Stain or paint to keep in good condition. Use decent quality exterior paint and always check the “oops” section of Lowes for mistake outdoor paints and stains
- Store all of your projects off the ground when not in regular use
- Buy a mix of high and low end (Michael’s on sale and Dollar Tree) fake flowers in the same color scheme to decorate
- Look for wooden pallets getting tossed out. They are your best friend and make a great construction base
- Make sure that you keep all of the jumps secure and safe (no exposed nails or screws)
- Cut, sand, or round off any sharp corners on jump bases so you get less mashed if you fall into it
- Measure twice and cut once
- Always predrill into your wood with a smaller drill bit than the screw you are using. Screwing into raw wood can split it
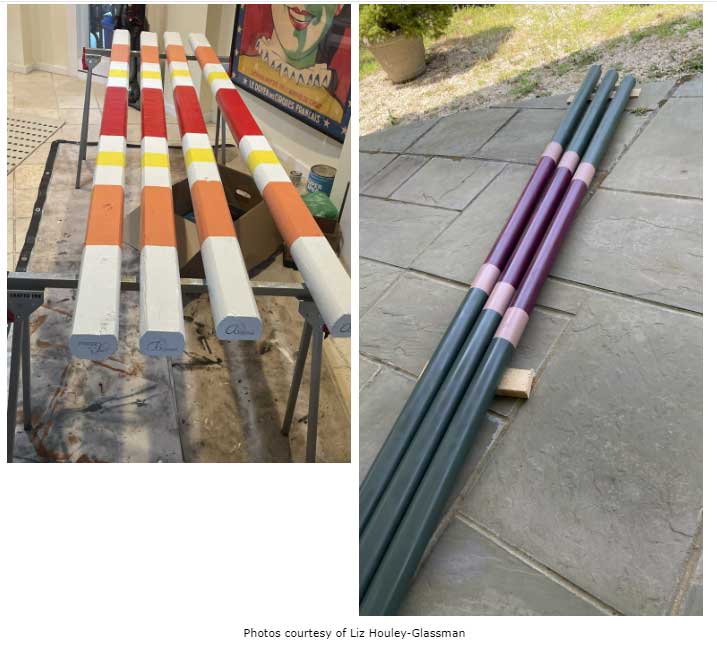
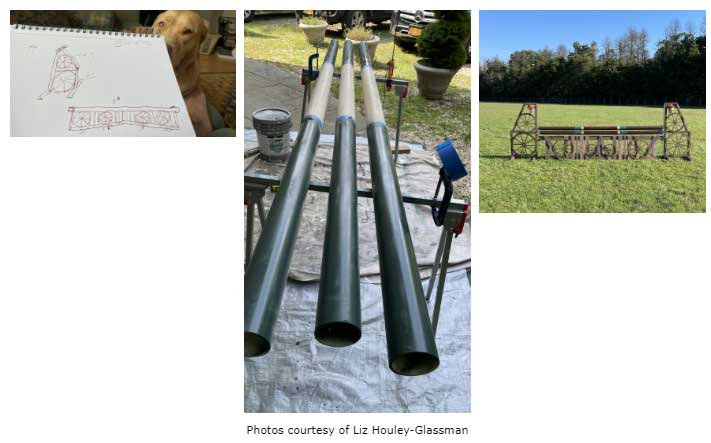
- Make the most of found items. I would love to only use 10’ round wooden poles but they are very costly and almost impossible to source where I live so I used many old 10’ PVC pipes that were lying around. I sand them and paint them Landscaping timbers are a great option to use as poles too. They are only 8’ long but the bright side is that they force you to ride “straight”. They fit well in our smaller ring and are pretty darn solid so if your horse gets wise to the lightweight PVC poles add these poles into the mix
- Always add a small base or feet to the jump fillers so they blow over less
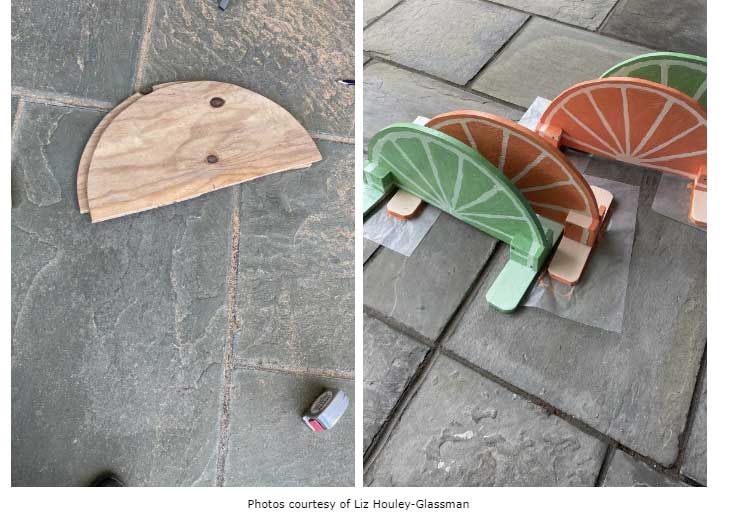
- A great “cheat” shortcut is to buy the easy up jump “pin-less” jump track and pins. The best price I have found by far is on Schnieders website. The track also enabled me to use 2” x 4” wood vs the 4” x 4” for standard bases Name your jumps with barn mates help. When I had some left over half round pieces from the stone wall I thought they would make cute fillers. We collectively decided between “fruit slice and planets”. Fruit slices won out. Some of our other creative jump names are “Lilly” (as in Pulitzer), Daisy, Red Door, Piano, Green Fuzzy and the self-evident “roll top, stone and wagon wheel”
- I personalize and add a stamp of our “Artemis” barn logo on every piece I make
- Each jump starts with a sketch and a general plan of attack
How to tips on some of the specific jumps
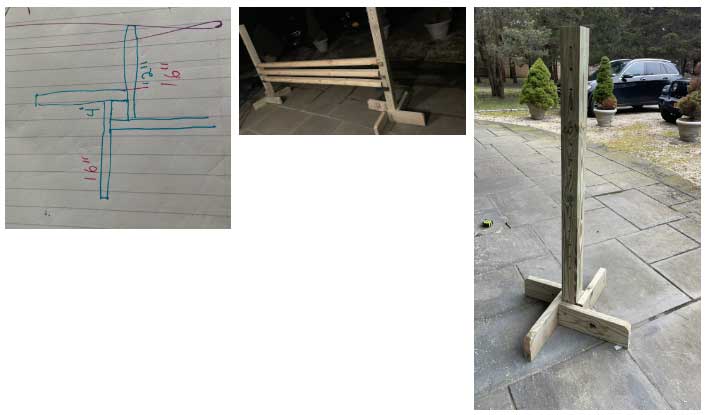
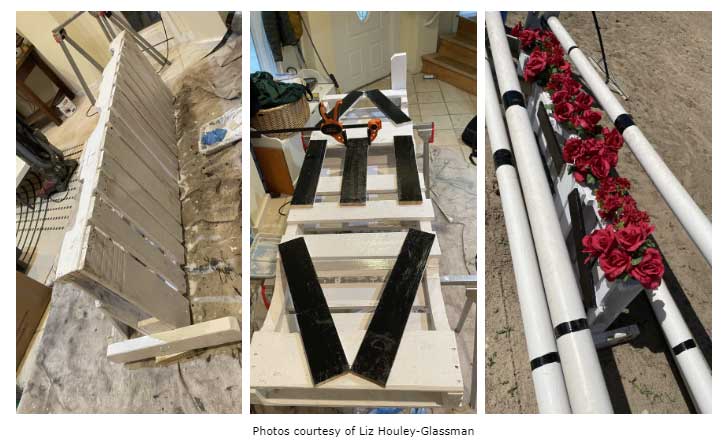
Plain skinny standard
The build description below sounds so much more complicated than it is but here goes.
I bought 2 – 4”x 4” x 10’ and cut them into two 5’ tall pieces. I created a “pinwheel” pattern for the base fanning it around the 4”x 4” standards with 4 – 16” sections of a 2” x 6”. I suggest using 9” long carriage bolts/nut to really secure the base long term.
While building you can “tack it” together with screws to hold it while drilling through the all the base layers for the permanent connectors, I suggest an electric drill for this part of the job because it’s work getting though 8 inches of pressure treated lumber to reinforce with the carriage bolts.
Drill 2 holes on opposite sides of the base to create a total of 4 holes. Space the 4 drilled bolt holes (2 on each side) to that they cross but don’t cut into each other’s bolt path. Cut the excess bolt length and tighten to secure with a ratchet.
I drilled jump cup holes every 3” starting about 18” high about the base. Make sure these are straight and test with an actual jump cup with pin to make sure they work.
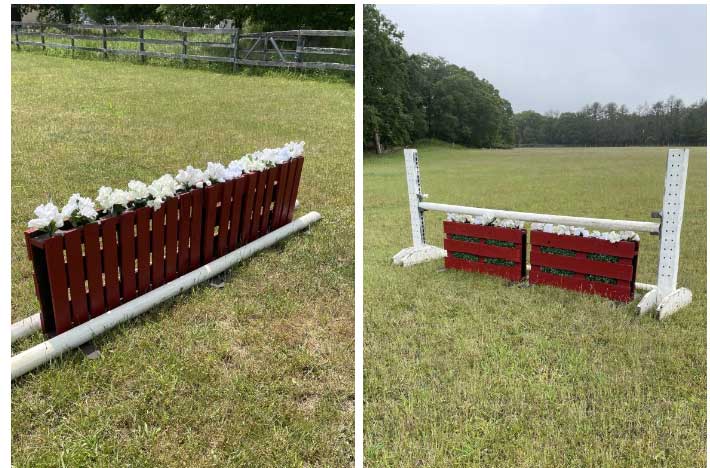
Basic Pallet Jump/Filler
The “Green Fuzzy” jump is made of 2 back-to-back (double wide” pallets with cheapo amazon “boxwood panels” wrapped around it. I cut the pallets down to the height of the jump. There is a logical cutting pattern to each pallet. I think they are 2’3”). I tossed or reused the parts of the palettes I cut off.
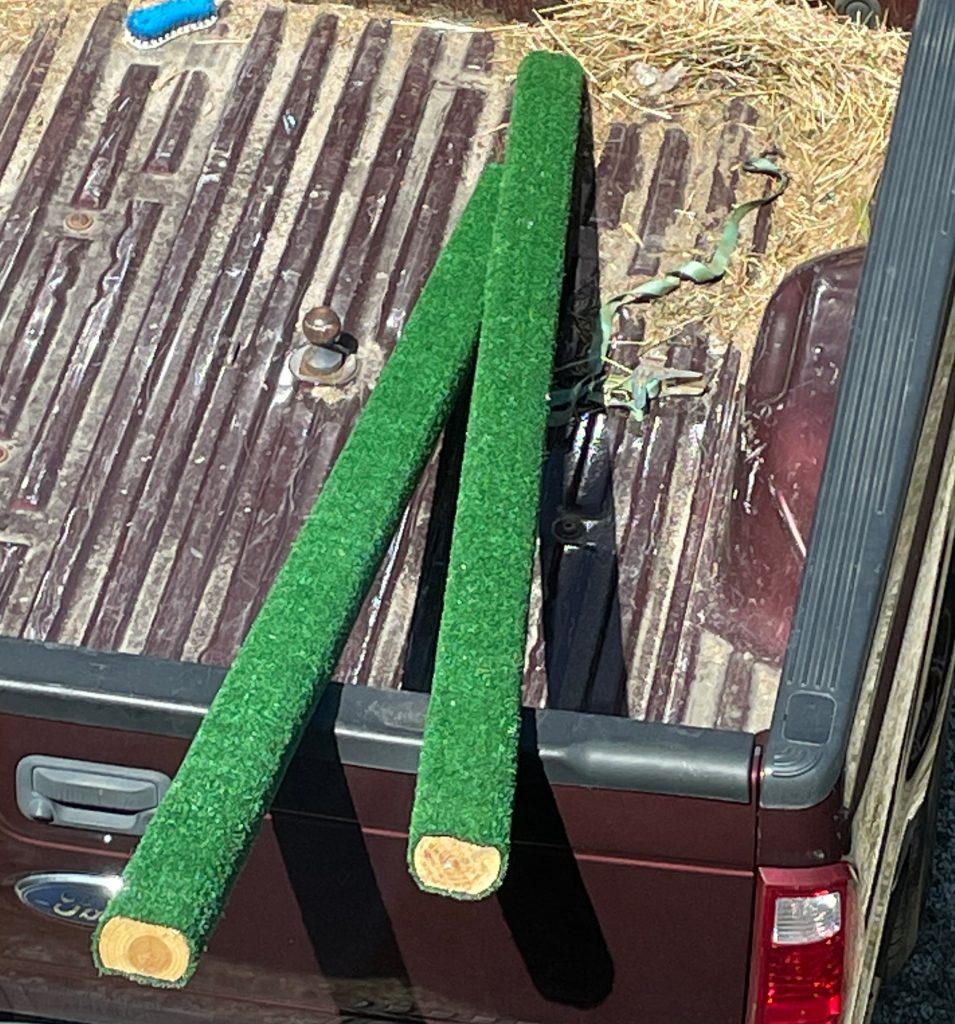
The fuzzy poles are made of 8’ landscape timbers wrapped with cut sections of a cheapo 5’ x 8’ astroturf rug. The Astroturf is carefully secured with 1” long lathe screws.
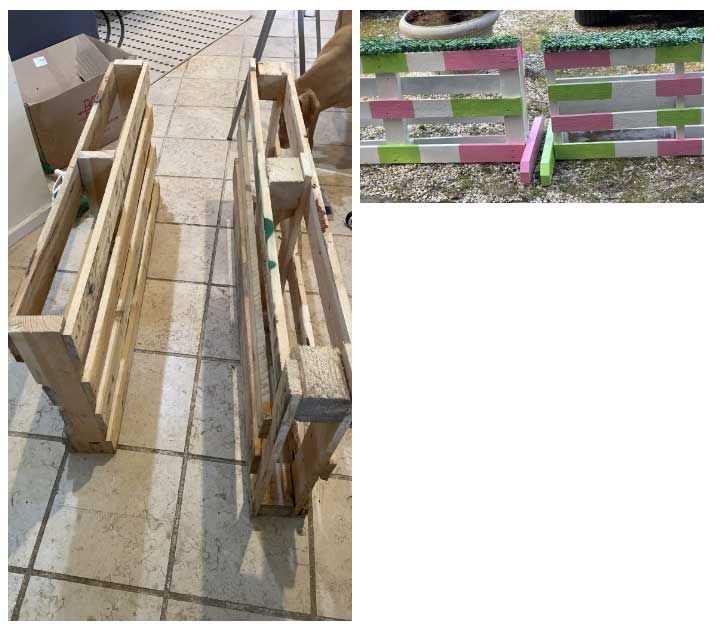
The Piano jump combines two pallets lengthwise and extra pallet wood was added in a random pattern and painted black and white.
Rainbow uses two palettes for the base and new solid 1” x 3” sections. Primed and painted. We added glitter to the paint to the top of the jump because our trainer’s young daughter wanted us to.
Every pallet jump has evenly drilled holes at the top so we can easily insert our flowers.


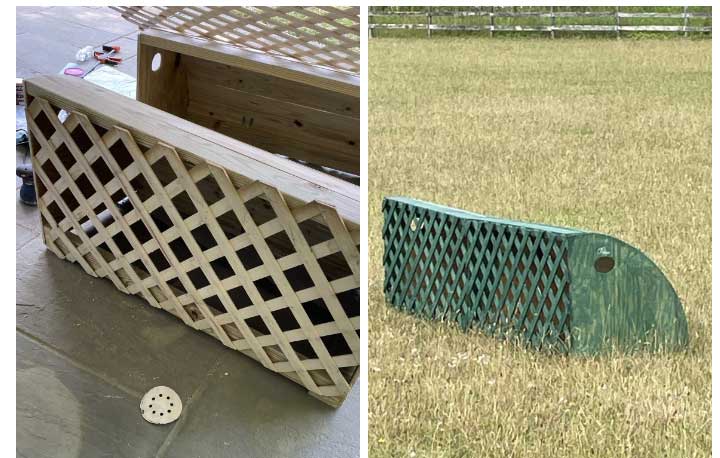
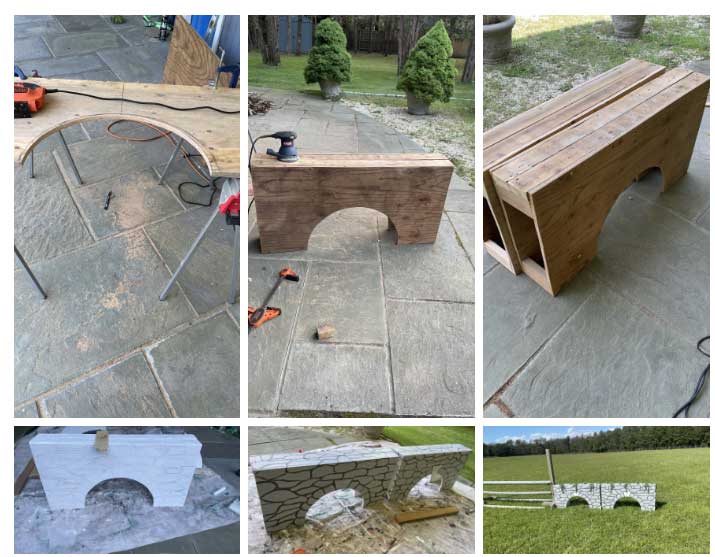
Roll Top
I built two 4’ long sections so it was light enough to move without getting a hernia. I cut 4 half round cuts and used heavier 2”x 4” lumber at the top and the front and back of the base.
I filled the curve with 1” x 3” lumber. I cut out and sanded hand grips and stained it a hunter green inside and out. The back features a premade lattice. The heavier frame serves as a makeshift mounting block in a pinch.

Stone wall
I reused wood leftover from a barn construction job and drew a stone pattern. The remaining half round cut outs became the hand drawn and painted “Fruit slice fillers”
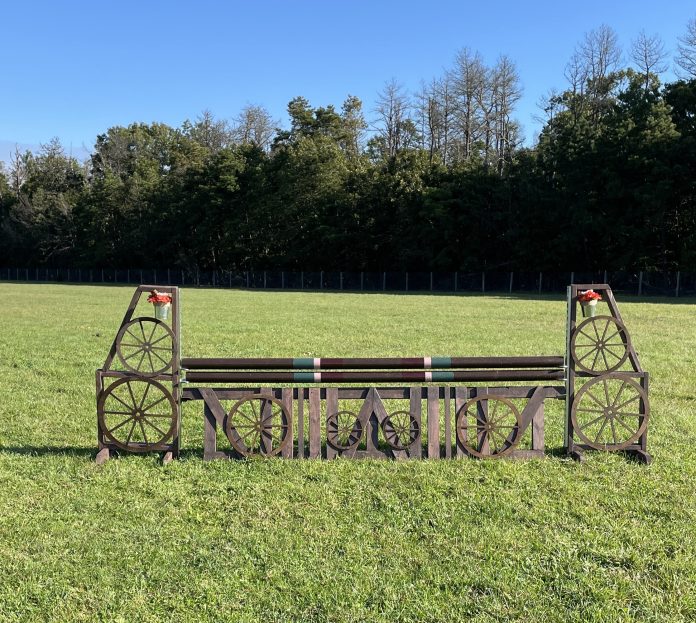
Wagon Wheel
I found thicker decent quality decorative wagon wheels on amazon and incorporated these into the jump. This jump has a nice flat area to place your phone on during lessons.
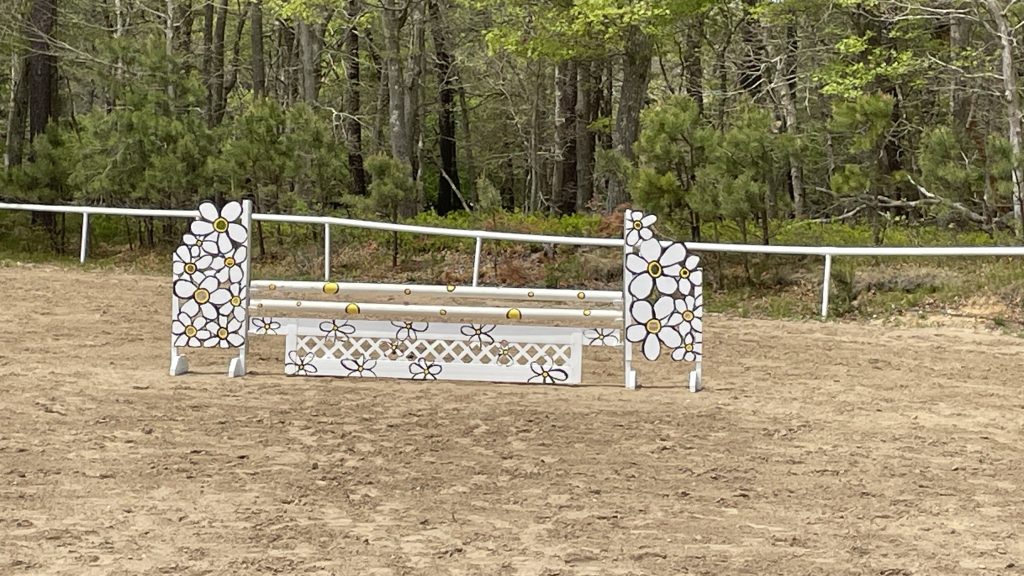
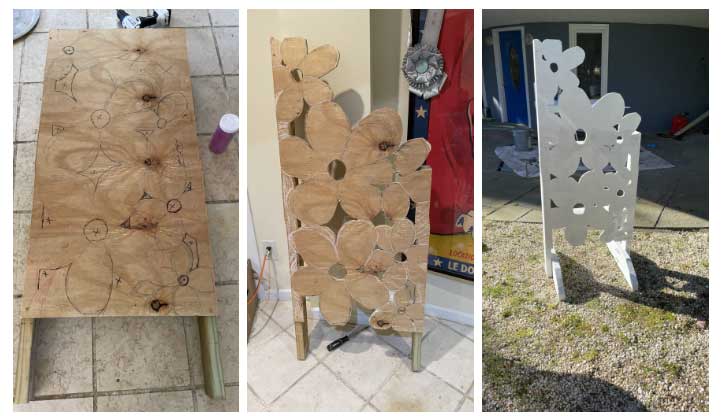
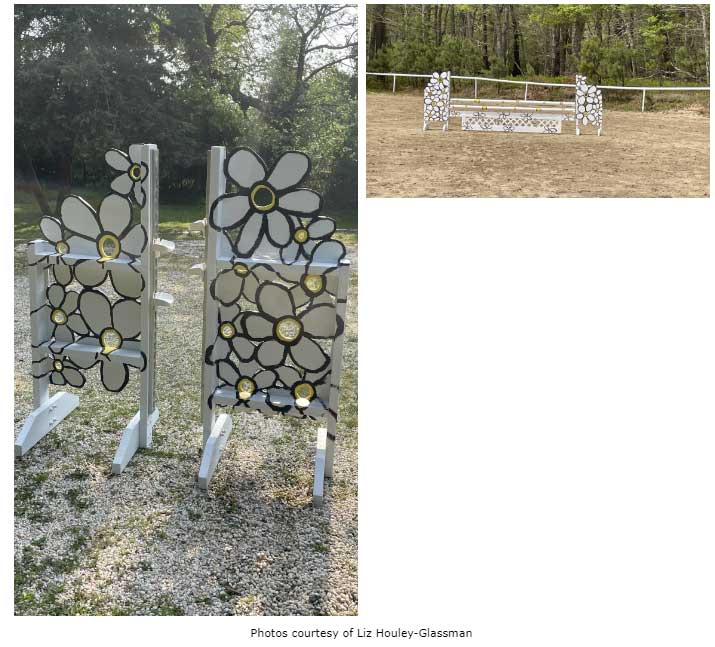
Daisy
I hand drew the free-form flowers on plywood and used a jigsaw and or rotosaw to cutout and paint. This jump features a section where we keep our water cups.
This article originally appeared on The Plaid Horse and is published here with permission.
The are more interesting and informative articles in our section on Recreation & Lifestyle.